How to Upload Your Own Photos & Videos in Animoto
Personalize your Animoto videos in seconds by uploading and adding your own photos and clips. Adding your own media allows you to completely customize your videos, and even better, it’s really easy.
In this post we’ll walk you through the different ways to upload and add your photos and clips to your Animoto videos on your computer and in the Animoto iOS app, let’s get started.
Upload before you start editing
After selecting one of our easily-customizable templates or starting your video project from scratch, you’ll see the option to upload media before reaching your workspace.
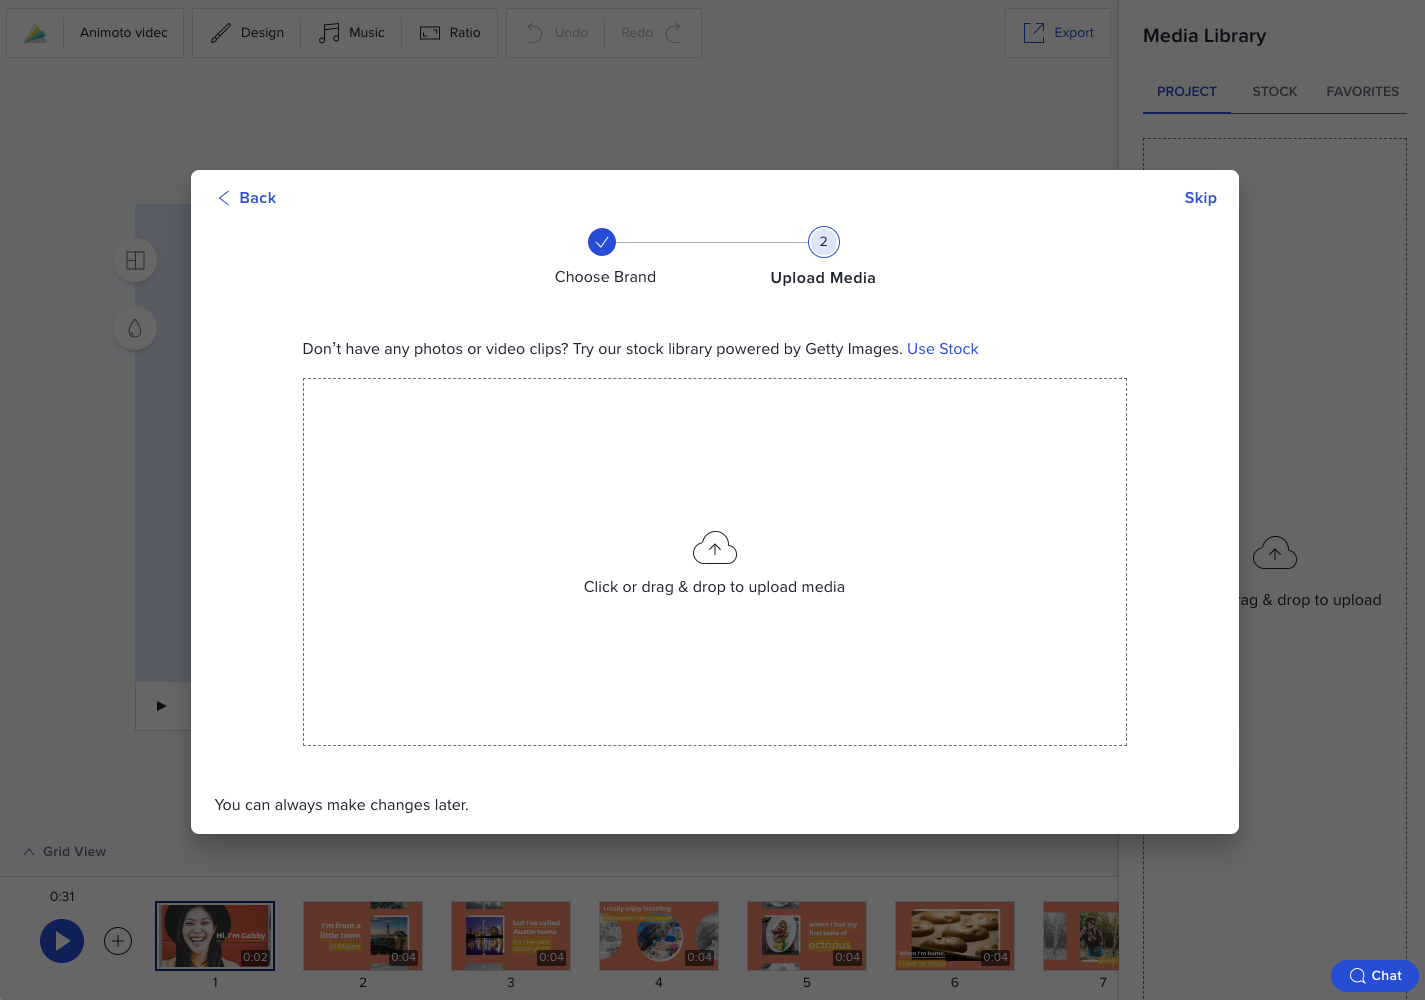
Once you see this screen, you can either click in the media box to browse your computer, or drag and drop your media from your desktop or documents window. No pressure to upload your media now, you can always click Skip to add it later on.
Upload in the Media Library
If you skipped over your first upload option, or decide you’d like to upload additional photos and videos while you’re editing, you can upload media at any time by selecting the Project tab in the Media Library.
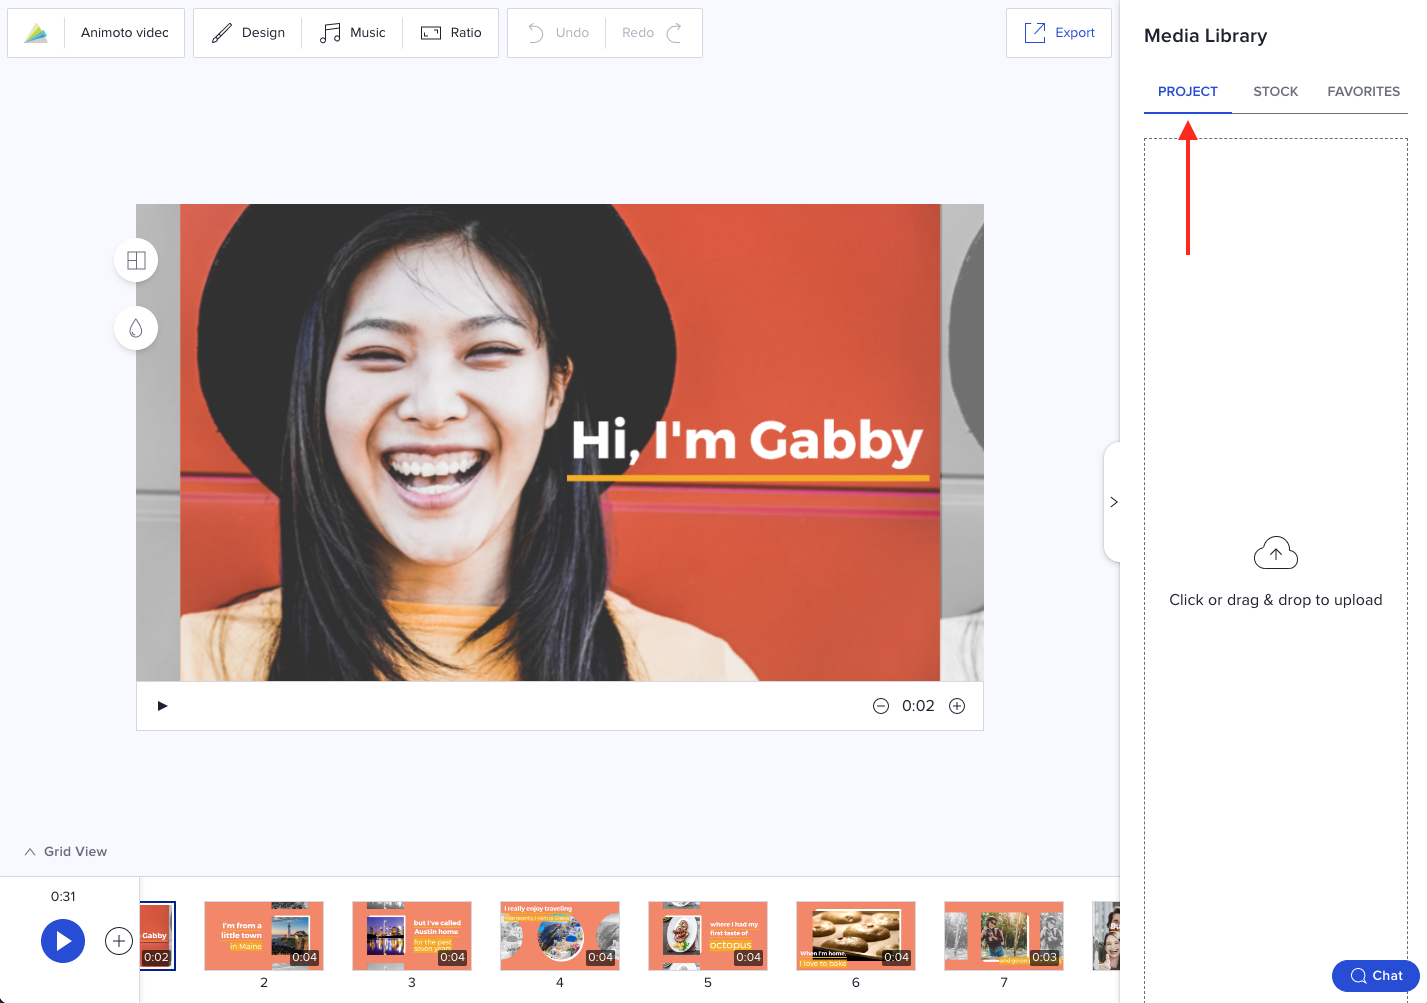
Here, you’ll have the same options of clicking to browse your device or dragging and dropping your media directly into your Media Library.
Drag and drop into your video
Once you’ve uploaded media to your workspace, it’s time to add it to your video! The first way to do this is by simply dragging and dropping your photo or video clip directly into your video where you’d like to add it.
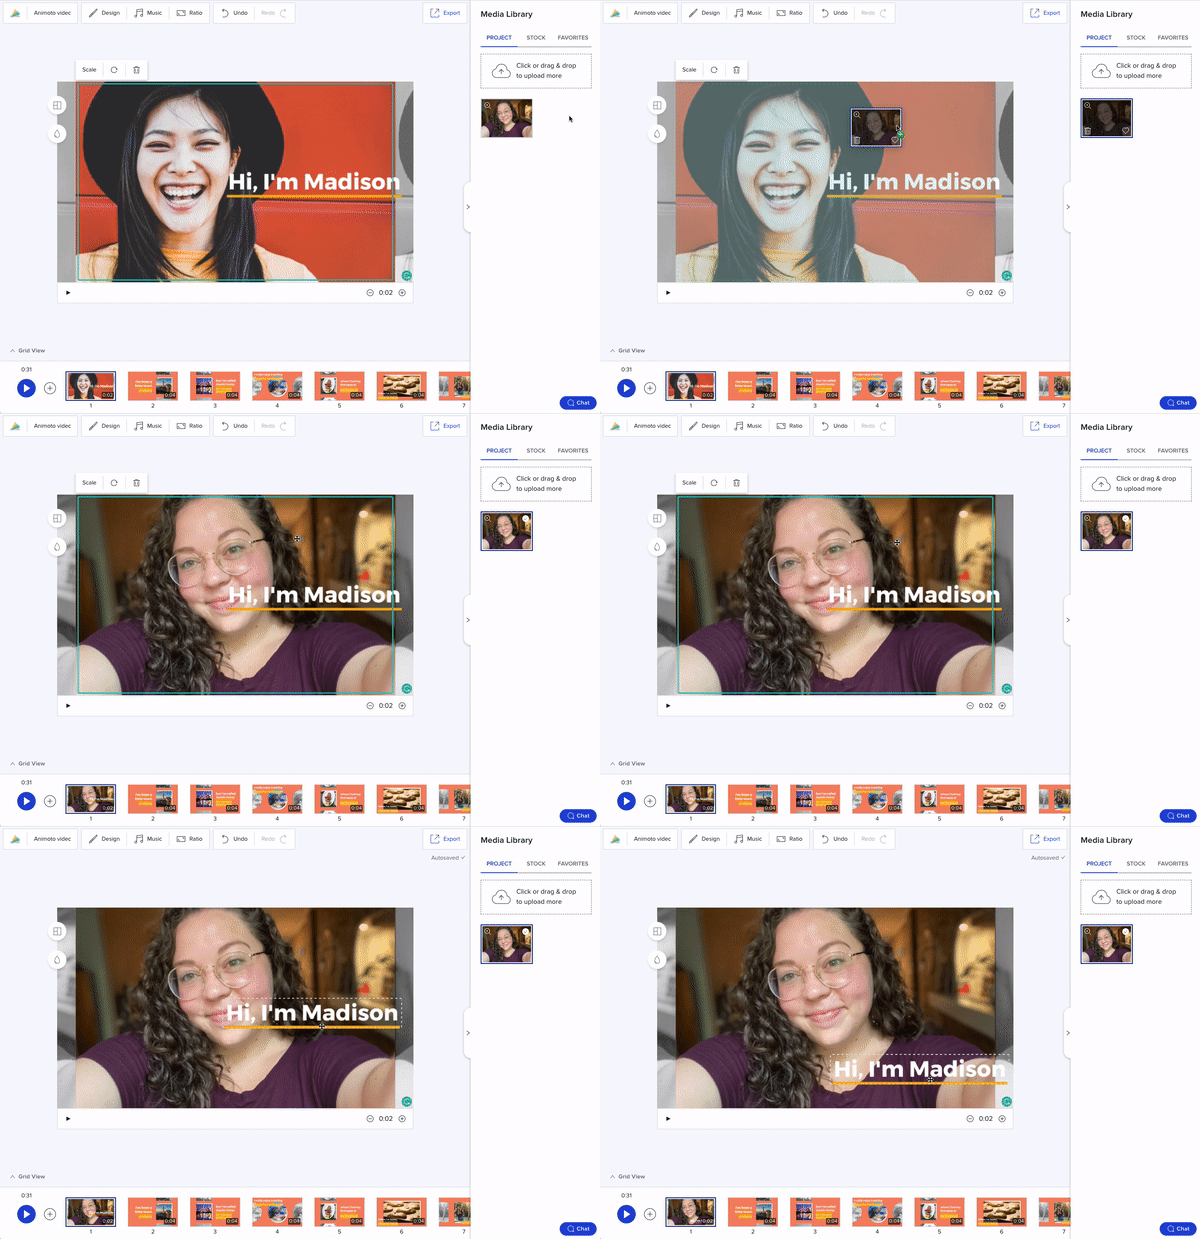
You can edit your added photos and videos by zooming, cropping, rotating, trimming, or adjusting any text in the template to work with your media.
Add to your timeline
Want to create a new block to showcase your media? You can always click the grey plus icon in your timeline to select a layout and add a new block, but you can make it even simpler by dragging and dropping your media from your Library directly into your timeline.
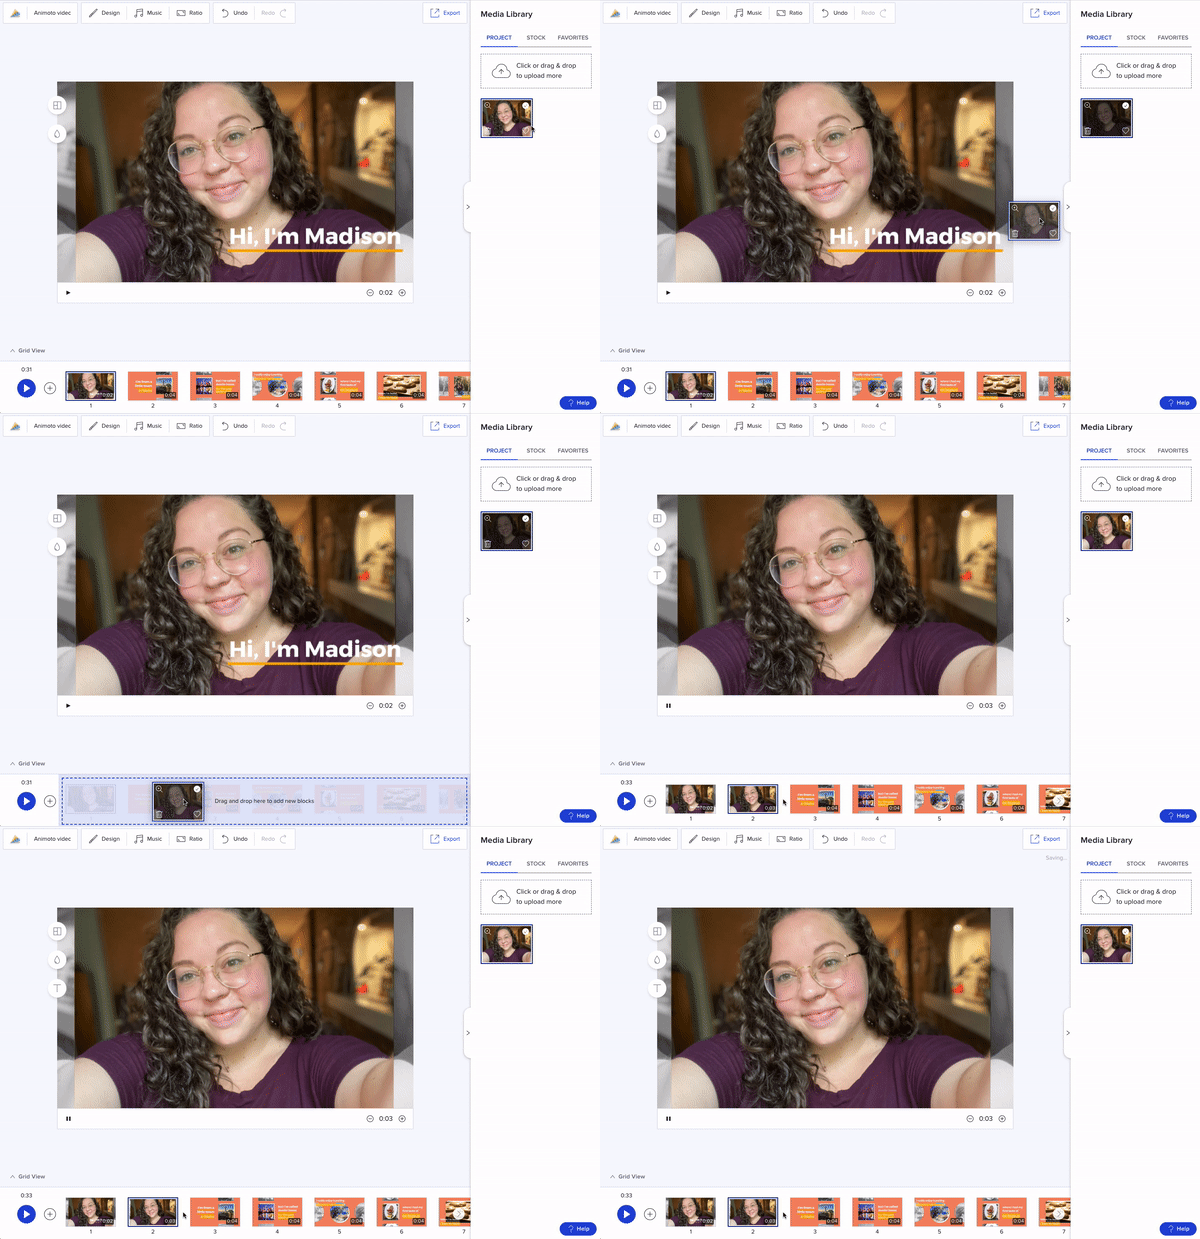
When you do this, we’ll automatically create a new, media-only block with your photo or clip. If you’ve selected a template, or if you started from scratch and selected a theme or video style, your new block will maintain the same design elements as the rest of your video.
Adding & editing multiple new blocks to your timeline
If you have multiple images or clips you’d like to add to your project, you can easily upload them using one of the methods above, then drag and drop them all into your timeline at once. Click and hold the Shift button on your keyboard to select multiple images or clips, we’ll also give you the option to Select all.
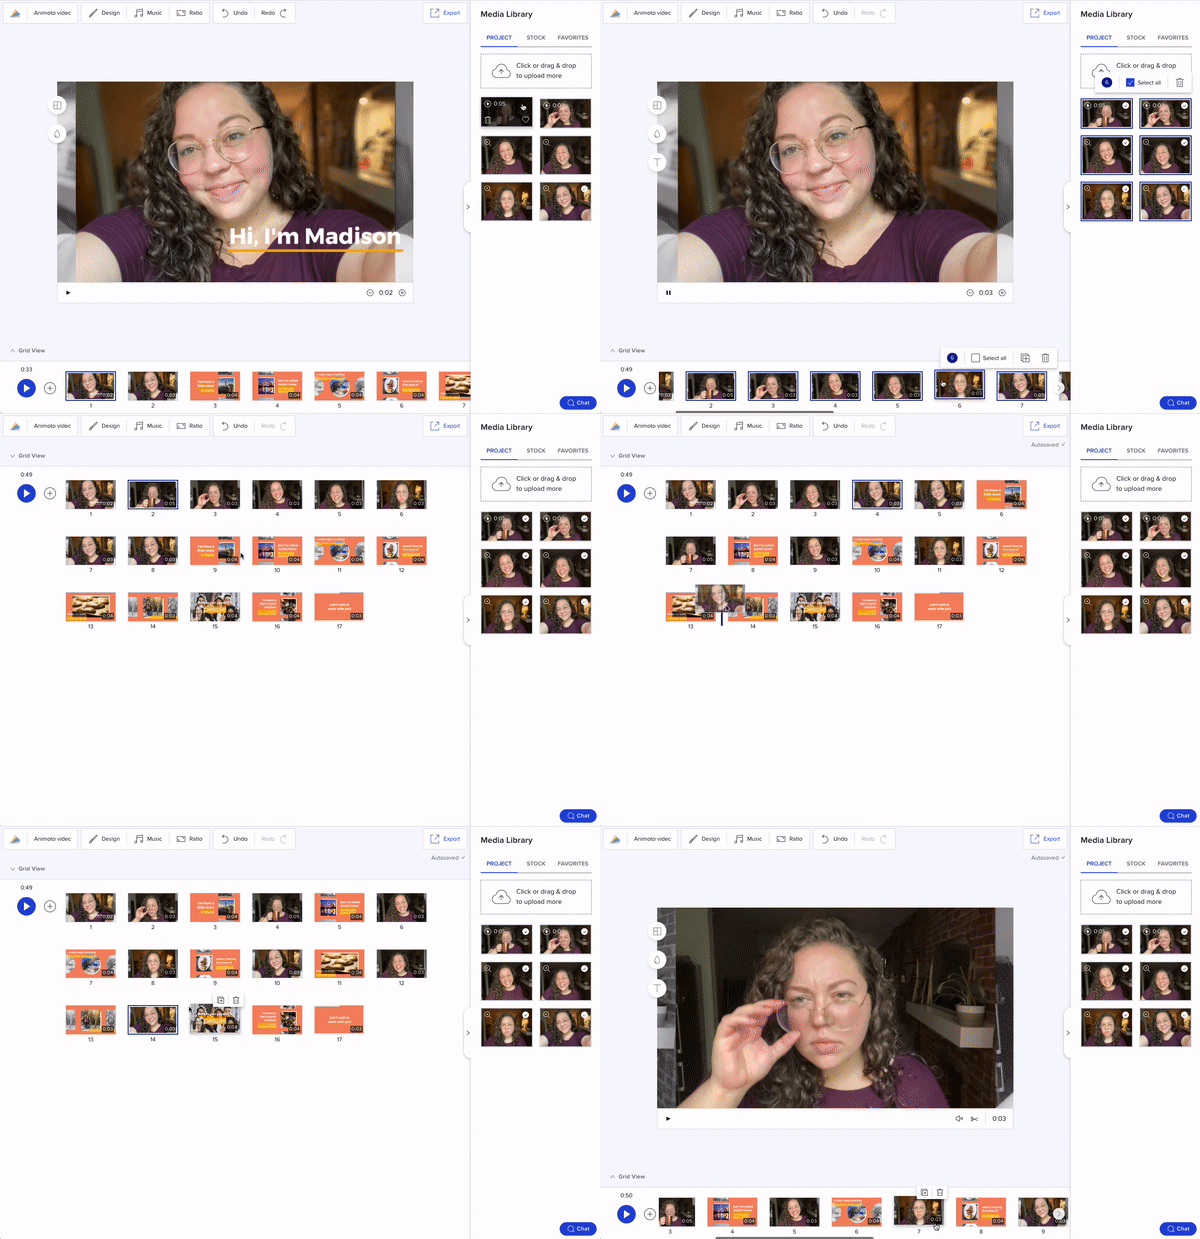
Once you drop your images and clips into your timeline, you can get a quick preview of all of your blocks by clicking Grid view. Here, you can easily rearrange your blocks with another simple drag and drop.
Uploading & adding in the Animoto app
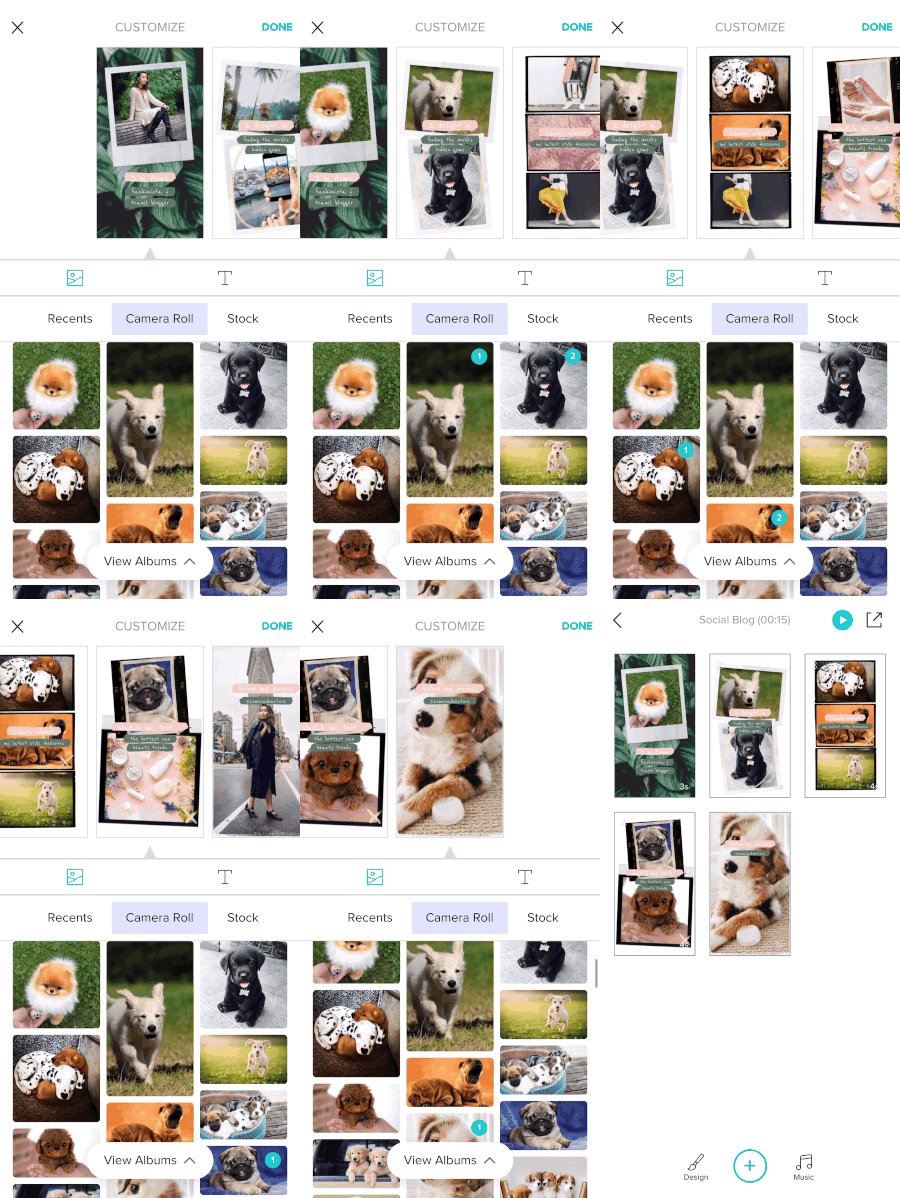
Adding media to your videos in the Animoto iOS app is just as easy as it is on the web. Once you start a project, you’ll see three options: Recents, Camera Roll, and Stock. To add your own media, click on Camera Roll and scroll until you see the photos or clips you’d like to add. You can also browse by album to find what you’re looking for even quicker.
Start uploading now
Jump right in and upload your own photos and clips to your next video today! Then, be sure to join our Social Video Marketing Community group on Facebook to share your results.
Tags:
- Marketing video
- Video ad
- How-to video
- Slideshow video
- Social media
- Promo video
- Birthday video
- Intro / Outro videos
- Explainer video
- Email marketing
- Training video
- Internal communications video
- Presentation video
- Business
- Photography
- Real Estate
- Non-profit
- Education
- Ecommerce
- Fitness
- Marketing Agency
- HR / People Ops
- Corporate
© 2024 Animoto Inc. All Rights Reserved.