Getting Started with TrueView for Action YouTube Ads
We recently shared a short guide to YouTube for action, a combination of features that YouTube is touting for driving conversions. These features include intent-based audiences, improvements to measurement, and the TrueView for action ad format, which we’ll be diving into here.

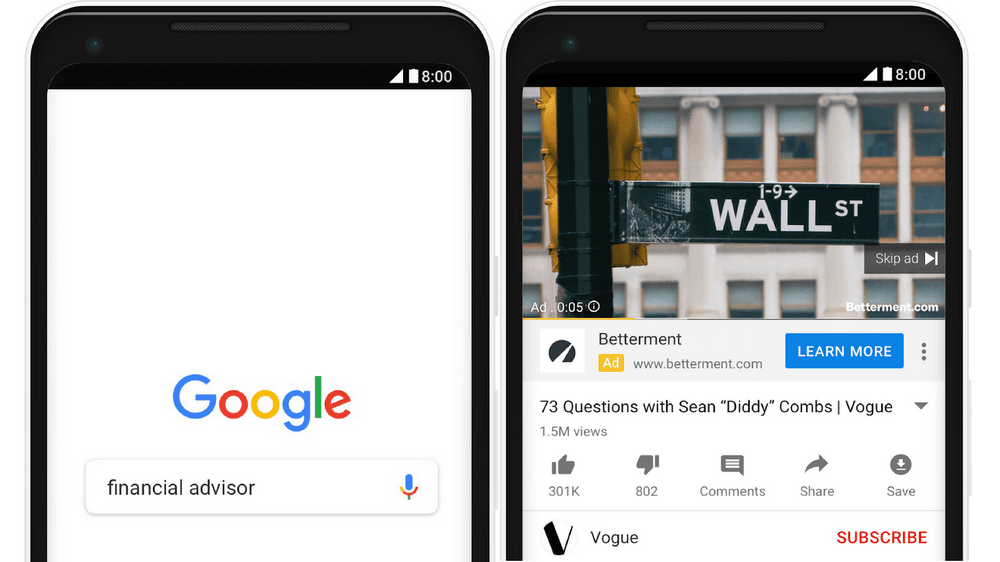
TrueView for action is the video ad format designed to drive leads and conversions with prominent calls to action and headline text overlays. It’s recommended that they be paired with custom intent audiences that have searched for specific keywords and terms related to what your ad is about. Here’s what it looks like, as illustrated on the Google blog:

In this article, we’ll share some tips and best practices for creating TrueView for action ads. Plus, we’ll show you how to set up a TrueView for action ad on YouTube. Let’s get started!
Best practices for TrueView for action ads
Before you can run your ad, you’ll need a video! You can use any video that’s uploaded to your YouTube account to run your TrueView for action ad. However, YouTube recommends 15 to 30 seconds as the ideal length for this ad format.
TrueView for action ads are skippable. This means that viewers will be given the opportunity to skip your ad after the first 5 seconds. But if they stick around and watch until the end, an end card will display featuring your brand, plus a call to action (CTA) button inspiring viewers to take action. That’s why it’s important to create a video that grabs viewers’ attention and doesn’t go so long that it loses their interest.
Before you start making your video, here are a few best practices to keep in mind:
- Indicate value quickly. Remember, viewers that see your ad are waiting to watch the video they actually came to see. So you need to give them a compelling reason to stick with you. Capture their attention in the first 5 seconds by indicating what problem your product or service can solve for them. Then, quickly explain how.
- Include a clear call to action. TrueView for action is designed to inspire action, as the name suggests. But if viewers don’t know why they should click, they won’t.
- Include your logo and branding. Even if people don’t end up converting when they watch your brand, you can still gain brand recognition by including your logo early on in your video.
How to make a TrueView for action ad
Now that you’ve got some best practices in mind, it’s time to make your video. If you need a little help, you’re in luck! We’ve got a TrueView for Action ad video template to help you get started. Drop in your own video clips and update the text with messaging for your own business.
You can also start from scratch if you’ve got a narrative for your video planned out. Add your own photos and video clips, text, select your brand colors, add your logo, and you’re good to go! Learn more about using Animoto for YouTube ads.
How to set up a TrueView for action ad
Once your video is created and uploaded to YouTube, you’re ready to set up your ad. In this section, we’ll show you how.
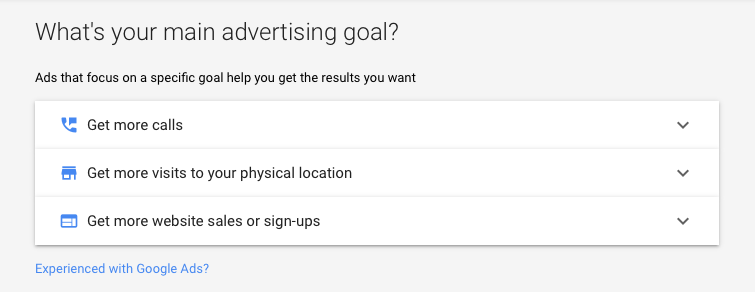
Before you get started, you’ll need to log in to your Google Ads account. If you don’t have one yet, it’s easy to get started. You’ll just need to add some basic information about your business. Once you’re in, if you see the following screen just click on “Experienced with Google Ads?” so that you can follow along with the steps in our guide.

Step 1: Start a new video campaign
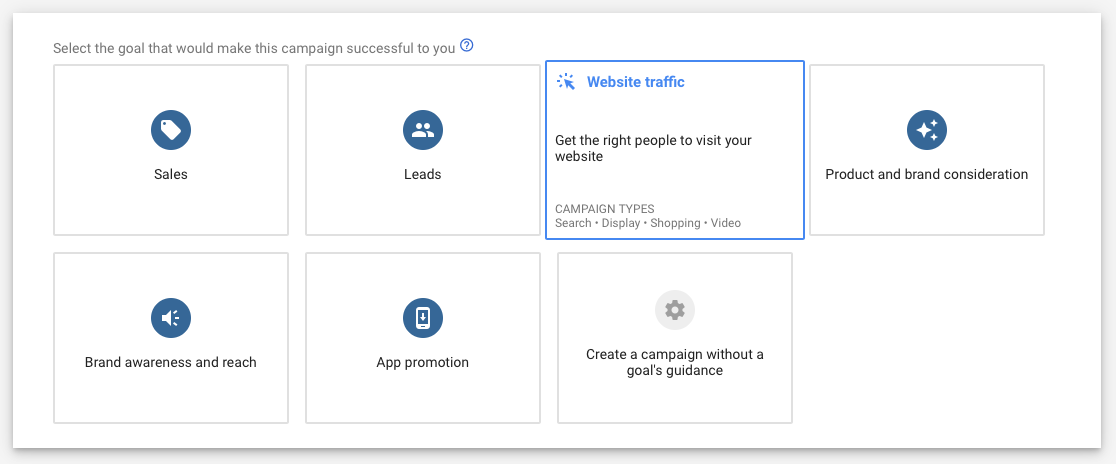
The first thing you’ll do is start a new campaign in your Google Ads account and select a goal. For this type of ad, you’ll need to select either the "Leads" or "Website Traffic" goal.

Once you’ve clicked on your selection, you’ll be prompted to select a campaign type. We’ll be selecting “Video” since we’re creating a video ad.

If you haven’t set up conversion tracking yet, you’ll be asked to do so now. Don't worry, they'll take you through a few questions to make it easy. Setting up conversion tracking will help you track the effectiveness of your ad. Let Google Ads know what your desired result is. Then, add the provided tag to your website to close out the process.
Step 2: Add a campaign name and details
Now it’s time to fill out all the pertinent details of your campaign, including the following:
- Campaign name: Give your campaign a name that’s memorable so you can remember which it was when you go back later to review your results.
- Budget and dates: Set your daily budget. YouTube recommends using a daily budget that’s 20X your target CPA if you’re using Target CPA for your bid strategy. If you’re using Maximize Conversions for your bidding strategy, it’s recommended that your daily budget is 10X your CPA.
- Start and end dates: Set dates for time-boxed campaigns. Start and end date options will only show up if you choose “Campaign total” instead of “Daily budget.”
- Bidding strategy: Set your bid strategy to Maximize Conversions or Target CPA. If you aren’t sure, there’s a helpful tool tip that explains more when you’re setting up your ad.
- Languages and locations: Select the language and location of the audience you want to target. It’s important to keep in mind the language your video is in.
- Ad group: Name your ad group. Ad groups are collections of ads that share similar targets.
Step 3: Set up your target audience
Next, you’ll need to set up your audience. You can choose an audience according to demographic targeting, or you can filter according to terms, phrases, or URLs. This helps you ensure that viewers have shown interest in terms related to your business, or in some cases have even visited your website already.
Check out this great YouTube ads tutorial to learn more about intent-based audiences in YouTube or head over to read our full article on understanding intent-based audiences in YouTube.
Step 3: Create your video ad
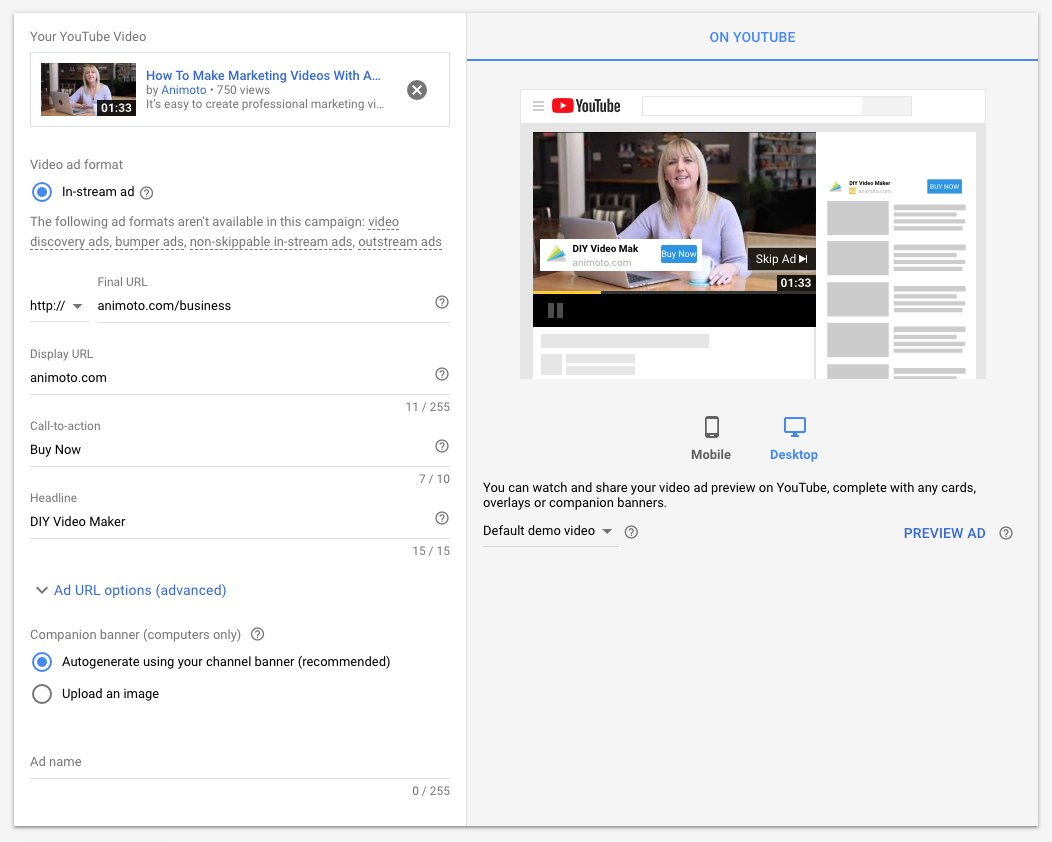
Now it’s time to create your video ad. You’ll do this by pasting the YouTube URL of the video you’d like to use into the Google Ads manager. Doing so will pull the video’s title and thumbnail. Then you can add your CTA and final URL, along with display copy, and preview what your ad will look like on web and mobile.

Click Save and Continue. Your ad is created! You should be able to preview and enable it in the campaign manager, under the "Ads & extensions" tab.

YouTube recommends waiting 7 to 14 days after your ad starts running to make any changes. This’ll allow the target CPA algorithm to adjust. Check out this Google Ads tutorial for a walkthrough of this whole process.
Looking to learn more about how to use YouTube for your business? Check out our YouTube Marketing 101 guide. Plus, check out our 21 YouTube video ideas to get you started. Happy video making!
- Marketing video
- Video ad
- How-to video
- Slideshow video
- Social media
- Promo video
- Birthday video
- Intro / Outro videos
- Explainer video
- Email marketing
- Training video
- Internal communications video
- Presentation video
- Business
- Photography
- Real Estate
- Non-profit
- Education
- Ecommerce
- Fitness
- Marketing Agency
- HR / People Ops
- Corporate
© 2024 Animoto Inc. All Rights Reserved.